How to Test a PCM
Modern cars rely on computers to manage their various systems. For example, when was the last time you or someone you know had to adjust their car’s timing? Unless you’re a classic car collector or you’re old enough to carry an AARP card, the answer is probably “never”.
There’s a reason for that; we have computers to handle timing, air to fuel ratio, and even when and how our automatic transmissions shift. The advantage of this isn’t just less maintenance. It also means you get better gas mileage and performance since computers can make adjustments on the fly to compensate for changes in temperature, humidity, and road conditions.
The disadvantage? Computers are a pain in the rear to diagnose. To help you out, we’ve put together a handy guide.
What Are the Symptoms of a Faulty PCM?
Many of your car’s functions are controlled by the powertrain control module (PCM), which works in conjunction with the engine control module (ECM) and transmission control module (TCM) to adjust engine timing, the air to fuel ratio, and other systems.
So before we talk about how to test a PCM, here are some common symptoms of a PCM failure.
- Your “check engine” light is on
- Other warning lights may be on, including traction control and ABS
- You lose fuel economy for no apparent reason
- Your car stutters when starting, requires multiple attempts, or won’t start at all
- Stuttering or stalling during idling
- Your transmission sifts erratically, skips gears, or fails to shift at all
- Poor performance and acceleration
There are other things that could be causing these symptoms. For example, poorly-inflated tires can cause a drop in gas mileage, and hard starting can be caused by a weak battery or failing starter. But if you’re experiencing two or more symptoms with no other obvious cause, it’s a good idea to check your PCM.
What Tools Do I Need?
Before starting any job, it’s important to have the right tools for the task. Here’s what you’ll need to test a PCM:
- Flashlight
- Standard and Philips screwdriver
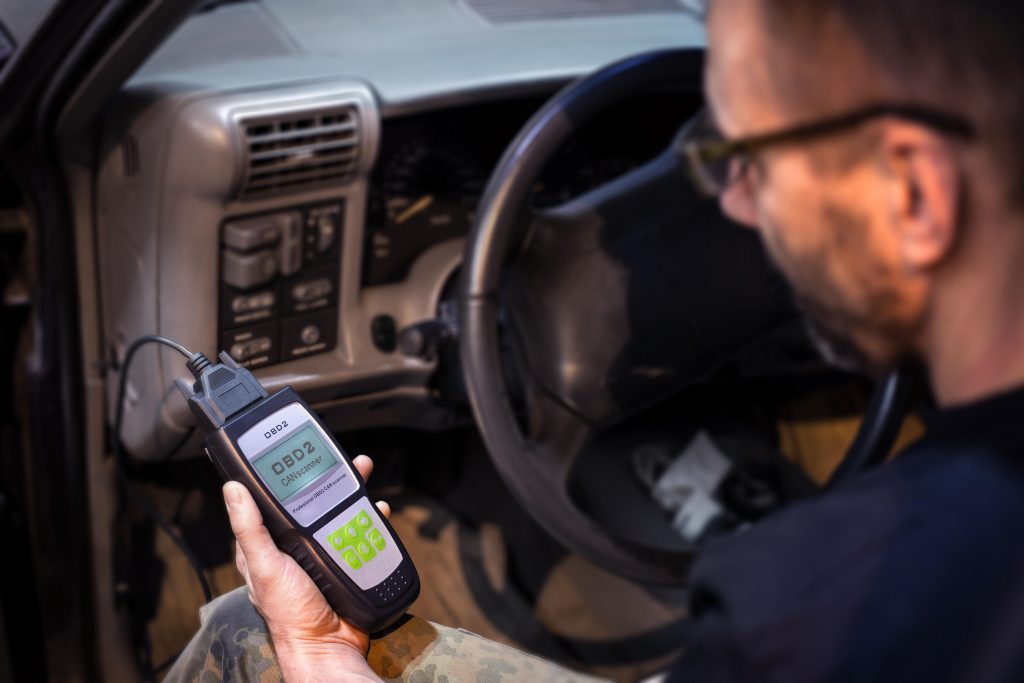
- OBD or OBD II code scanner (check with your car’s manufacturer on device compatibility)
- Multimeter
- A new PCM (if replacing)


Step 1: Visual Inspection
Now, before you start doing any surgery on your car, the first thing to do is to check for rust or a disconnected wire. This isn’t the most common cause of a PCM failure, but it’s the easiest to identify.
Make sure that your PCM is connected to your battery, and that there’s no rust on the PCM itself or on the battery wiring. Reconnect any loose wires if necessary. If your PCM has experienced corrosion, you’ll have to skip to step 5 to see if it’s failed.
Step 2: Check Your Battery
While you’re under the hood, use your multimeter to ensure that your battery has a full charge. It should read at least 12.6 volts with the engine off, or 13.7 volts with the engine running. If it’s showing less than that, fully charge your battery and re-test. The reason this is important is that low voltage can cause certain sensors to fail, depriving your PCM of the input it needs to make correct adjustments.
Step 3: Code Scanning
If your battery is fully charged and there’s no visible rust, your next step will be to plug an OBD or OBD II code scanner into your vehicle and see if the PCM is producing any OBD error codes. This can be incredibly helpful in solving many mechanical and electrical problems since you can use these codes to narrow down which systems are causing the failure.
A codebook (or easy Google access) is a necessity here since you’ll need to learn what the codes mean in order to make head or tail of them. We’ve written about several PCM-related error codes in the past, including the P0603 code, the U0100 code, the P0113 code, and the P0606 code. Obviously, this isn’t an exhaustive list, but it represents the most commonly-displayed error codes.


Step 4: Inspect Wiring and Sensors
Hopefully, you had some success with the previous step, because this is where things can get tricky. You need to check the sensors that are connected to your PCM, as well as the wires that connect them. If you’re seeing a PCM code – or two, or three – it can really help you narrow in on which sensors or wires are faulty.
Perform a visual inspection of these wires, as well as checking them with a multimeter. Don’t forget to check ground wires and connection points, either, since these are frequent causes of trouble.
Once you’ve replaced any failed components, reset your car’s codes, and drive for a while. Most likely, you’ll have solved the problem.
Step 5: Try a Replacement
If all else fails, or to confirm some repairs, you may need to try running your vehicle with a replacement PCM. Ensure that the PCM is the correct version not just for your make and model, but for the same year as well. If it turns out that your PCM was faulty, you’ll immediately notice an improvement in performance.
And that, friends, is how to test a PCM.
What if I Need to Replace My PCM?
If you’ve followed all of these steps and it turns out that your PCM does need to be repaired or replaced, it’s a good idea to get professional help. While it’s possible to repair or replace your own PCM, it requires specialized tools, which you may only need to use once.
For more information on what SoloPCMs can do for you, contact us via our web form, or call us at 888-848-0144. Our technicians have decades of combined experience and are ready to help with any issues you may have.


